FIVE MOST POPULAR POSTS OF 2013
FIVE STAR CARAMEL CORN
If you are looking for a last minute gift idea that is super easy to make and even more easy to "consume mass quantities" (as the Coneheads would say); you have to try this caramel corn recipe from the cooks over at Table for Seven. I've tried a lot of caramel corn recipes over the years, and this is BY FAR the best one EVER!! As a matter of fact, picky-picky husband and I ate the entire batch in one evening, we just couldn't leave it alone!!
NOTE: Keep a cut of hot water that you can put the candy coated spoons in....makes clean up a lot easier.
NOTE: The final caramel corn is lightly crunchy and not at all sticky as long as you keep it in an airtight container.
SUPER EASY CREAM PUFFS
If you are looking for something super simple, yet impressive enough to WOW your dinner guests over the holidays, I suggest you make these cream puffs. They are SUPER easy to make, SUPER economical and SUPER fun to serve.
1/2 cup butter (cubed)(no substitutions)
1 cup water
Bring the water and cubed butter to a boil (just until the butter melts). While it's still boiling, add one cup of flour (all at once) and stir with a sturdy spoon until the mixture turns into a thick "glob" (it just takes a few seconds).
With the mixer still running, add four eggs, ONE AT A TIME, beating well in between each egg. The final dough will be quite sticky.
Either grease your cookie sheet or line with parchment paper (I like to use parchment paper) and place spoonfuls of this mixture (about the size of a golf ball?) on the prepared cookie sheet, making sure they are about 3-4 inches apart since, as they bake, they will puff up a lot.
Put in a PRE-HEATED 400°F oven and immediately turn the oven DOWN TO 350°F. Bake for one hour.
When you take them out of the oven, poke a small hole in the side of the baked cream puff to let steam escape. I have forgotten to poke that hole before and it didn't seem to make a lot of difference.
Cool completely on a wire rack.
To serve, cut in half and fill with sweetened whipped cream or berries and whipped cream or pudding, or ice cream or anything your family likes.
Dust the tops with powdered sugar or drizzle with chocolate sauce.
VARIATION: If you leave out the sugar and vanilla, these puffs are delicious filled with chicken salad, seafood salad, etc.
MELT IN YOUR MOUTH SHORTBREAD COOKIES
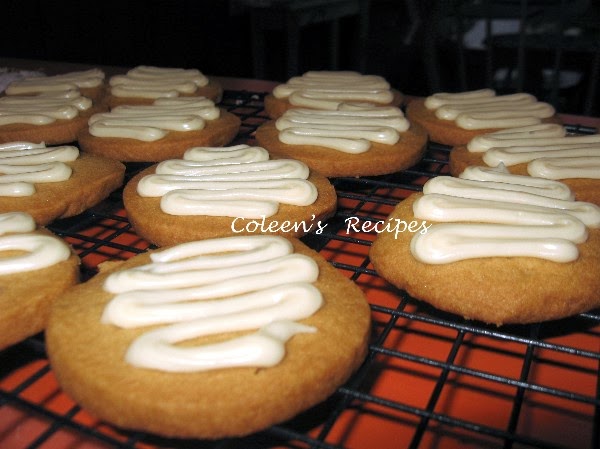
'Tis the season for Christmas cookies, and this is one of our favorites. Simple ingredients, simple instructions; you can make them as festive (or simple) as you want and they are still "melt in your mouth" delicious. Try these classic shortbread cookies for the holidays.
BRANDY SNAPS
If you want to impress your holiday guests, make some of these Brandy Snaps for them. They look so elegant and they are definitely not something you see on every holiday table.
A hard candy shell filled with sweetened whipped cream...do I have your attention yet? Pretty fool proof if you follow my extra tips below printed in RED, AND you can make them days in advance and fill them just before your guests arrive.
They look very hard to make, but it is an illusion; they are pretty easy if you pay attention to the tips below in RED.
2 tablespoons sugar
2 tablespoons white corn syrup
1/4 cup butter (I used only 3 tablespoons)
2 teaspoons brandy (or) 1 teaspoon vanilla (I used rum extract)
1/4 cup all purpose flour
Since this whole process goes VERY fast, it is best to have everything ready before you start cooking the above ingredients.
Preheat your oven to 350° and line a cookie sheet with parchment paper (important). These candy shells REALLY spread as they cook, so only plan on making six of them on each cookie sheet.
Mix the sugar, corn syrup and butter in a small saucepan. STIR over medium heat until the mixture is good and bubbling, then remove from heat and stir in the flour and flavoring.
Drop one measuring teaspoon (per candy shell) of the cooked mixture onto the parchment paper. This will spread out into a circle about 4" in diameter as it bakes for about 6 to 7 minutes, but watch them very carefully after six minutes, as they can go from caramel colored to DARK very fast. It sounds tricky, but it isn't.
My candy circles were fairly pale in color until they hit the 6 minute mark in my electric oven, but they were a beautiful light caramel color at 6 1/2 minutes.
When they have turned a nice light caramel color, remove from the oven and let them sit on the cookie sheet for about 30 seconds. If they look a little oily, LIGHTLY dab them with a paper towel.
Use a pointed knife and lift the edge of the candy circle up a little so that you can grab it with your fingers (be careful, this is VERY hot). One at a time, quickly roll the candy circle around the handle of a wooden spoon (they will cool almost immediately and hold their shape).
Once you form it around the spoon handle, it will instantly be cool enough to slide the candy tube off of the handle, and it's done!!
If the other candies get too "hard" to roll, put them back in the oven for 30 seconds or so (but that shouldn't be a problem, as they stay fairly pliable as long as they are on the hot cookie sheet), they only become rigid once they cool off.
I didn't use a spoon handle, I used some metal cannoli tubes I have and they worked perfectly (no need to grease the spoon handle).
Keep the cooled candy tubes in an air tight container until you are ready to serve them. Fill them with sweetened whipped cream (the candy tubes can be filled up to about an hour before serving).
Don't be scared off by any of my "warnings' about this recipe, it may sound complicated, but it really is pretty easy and I hope you try it.
NOTE: I substituted rum extract for the vanilla, the candy tasted like butterscotch. I think ANY extract would work.
NOTE: You don't have to fill these with whipped cream. Almost any mousse like whipped filling would work wonderfully.
BACON EGG and CHEESE TOAST CUPS
This is a very EASY recipe because most of it can be made ahead of time. It is a FUN breakfast to serve company or a bunch of rowdy teenagers or a breakfast buffet crowd because it can be finished off last minute!!
These little beauties are quite filling and two of them make a hearty breakfast.
The "do ahead part" is to spray the cupcake pan generously with vegetable spray, then put a "toast circle" (un-buttered) in the bottom of each cupcake well.
Next, pre-fry the bacon. I do mine in the oven (the day ahead) because it comes out perfectly flat and easy to work with. Click HERE for my post on cooking bacon in the oven.
Bake the bacon at 375 (no need to preheat) for about 20 minutes, or if you are frying it, cook it about 2/3 done (you want it almost done, but still pliable). Drain the bacon but don't let it cool down much (it tends to get stiff as it cools down). Quickly wrap each cupcake well, like this:
Add a healthy pinch of shredded cheddar ( I also like pepper jack cheese) on top of the toast, like this:
At this point, you can put them in the fridge and bring them out the next morning.
When it's time to eat, preheat your oven to 400 and carefully break an egg into each "nest"
Sprinkle with kosher salt and coarsely ground pepper. Put them into the oven for for 15-18 minutes or until the eggs are done to your liking. Let the finished eggs sit in the pan for a minute or two (don't worry, they stay very hot).
Scoop the baked egg cups out of the pan with a spoon (they come out easily). If you like your eggs done fairly well (like we do), you can pick these up and eat them out of hand, but if you like a soft set egg, you'll need a plate and fork.
along with fruit cups
THANKSGIVING MINI DESSERT
We just love mini desserts, don't you? No extra plates and forks (we use napkins), no "commitment" to a big slice of something; instead two or three different mini-desserts is more to our liking.
Todays recipe is a combination of two of my favorite holiday treats. It has a bottom layer of moist, spicy pumpkin CAKE and a top layer of rich and creamy CHEESECAKE; what could be better for your holiday buffet table?
ASSEMBLY
Super simple: place cupcake papers in cupcake pan and very lightly mist them with cooking spray.
Put a slightly rounded tablespoon of cake batter into each paper and make sure it covers the bottom. Top with cheesecake filling(dividing evenly between the 12 desserts).
Bake in pre-heated 350° oven for 25 minutes or until set (my electric oven takes exactly 25 minutes).
Cool to room temperature then chill for at least a couple hours.
NOTE: These little gems can be made two or three days ahead of time which is a huge help during the holidays. As a matter of fact, they taste even more moist after a couple days in the fridge. Just make sure that you store them chilled in an airtight container.
NOTE: This recipe makes 12 mini-desserts, but you can double it if need be.
CHRISTMAS COOKIES
I am a "list maker" and one of the lists I thoroughly enjoy making is my holiday baking list. From October through early December, I pour over my old tried and true recipes then surf the web for new recipes I want to try. I make a ton of cookies for Christmas, so I'm always on the hunt for a new one to try.
Below are three great Christmas cookie recipes; I hope you and your family enjoy them.
FRUIT CRUMB BARS
This is one of those wonderfully versatile recipes that is just as good with apple filling, as it is with cherry filling, or blueberry; whatever your family likes the best.
The crumb crust/topping goes together in just a couple minutes with the food processor and if you can wait long enough for the bars to cool down to room temperature, they cut beautifully. We (obviously) couldn't wait that long (in the photo below).
CRUMB CRUST/TOPPING
3 cups all purpose flour
1 cup white sugar
1 teaspoon baking powder
1/4 teaspoon salt
1 cup COLD butter (cubed)
1 egg, beaten
Put the flour, sugar, baking powder salt and cubed butter into the food processor and pulse until well mixed. If you don't have a food processor, do it with a pastry cutter and work it until the butter is well mixed. Add egg and mix well (it will look like coarse sand).
Press HALF of this mixture into a greased 9" x 13" baking dish. Top with fruit filling and top with the other half of the crumb mixture.
Bake at 375° if you are using a metal baking pan or 350° if you are using glass, for 40 minutes or until top crumbs are light golden.
(2) 14 ounce cans tart pie cherries packed in water
1 1/2 cups sugar (DIVIDED)
4 tablespoons + 2 teaspoon cornstarch
pinch of salt
1/2 teaspoon almond extract (do not leave out)
Drain the cherries, but save the juice. Put one cup of the juice in a saucepan and add HALF of the sugar, the cornstarch and salt. Bring to a boil and cook until nice and thick.
Remove from heat and stir in the OTHER HALF of the sugar, the cherries and the almond extract.
Glaze (optional)
2 tablespoon butter melted
2 cups powdered sugar
3-4 tablespoons milk
1/2 teaspoon vanilla extract
1/2 teaspoon almond extract (do not leave out)
While bars are still a little warm, mix 2 tablespoons melted butter with 2 cups powdered sugar, about 3 or 4 tablespoons of milk and 1/2 teaspoon vanilla extract and 1/2 teaspoon almond extract. Whisk until smooth and drizzle over fruit bars.
Warning to Fellow Bloggers
But today, totally by accident, I ran across another web page (from Indonesia, no less!!) that had a TON of my recipes and photos posted as if they were this persons own work; not a single mention or link back to my recipe page at all!! So I started looking around the Internet, and I was shocked to see how "common" this practice is.
So far, it seems that all of my photos that were swiped, were one's I posted before 2011. I'm guessing that must be, because in 2011, I started putting my name on my recipe photos; evidently, people don't like to steal photos that are labeled (I wish I had known that!!)
The funny thing is, is that I'm a terrible photographer!! Why are they stealing MY photos when there are so many great ones out there? Maybe mine are the ONLY ONES not labeled(?)
I am slowly going back through and labeling my old recipe photos, but it is a pain to do.
Thanks for listening to my rant.
Coleen
FIVE STAR CHOCOLATE PUDDING
OK, I admit I have posted a lot of pudding recipes, but then again, I have tried many, many more pudding recipes than I have posted, so I've tried to hold back and post only the best ones...........Oh who am I kidding, WE LOVE PUDDING!!
With that said, today's chocolate pudding is BY FAR THE BEST ONE YET. It has a silky smooth mouth feel (important in pudding), a wonderfully deep milk chocolate flavor and it has a wonderful consistency.........it is REALLY good.
3 (slightly heaping) tablespoons bakers cocoa powder
1/2 cup heavy cream
2 1/4 cups whole milk
1/2 cup brown sugar
3 egg YOLKS
2 level tablespoons corn starch
2/3 cup milk chocolate chips
5 tablespoons butter (cut into pieces)
1 1/2 teaspoons vanilla
Whisk the cocoa, brown sugar and corn starch together and set aside.
Whisk the cream, milk and yolks together in a saucepan that has a nice heavy bottom (it prevents scorching). Add the dry mixture to the wet mixture and whisk until smooth. Make sure you scrape the corners of the pan because the corn starch likes to "hide" there.
Cook on medium heat (stirring) until it gets thick and starts to bubble all over the entire surface of the pudding. TURN THE HEAT DOWN to a level where it still bubbles (but isn't going crazy) and cook/stir for another 30 seconds.
Remove from heat and add the butter, milk chocolate chips and vanilla; whisk until melted and smooth. Now, if you REALLY want that super smooth and silky mouth feel, pour the cooked pudding through a mesh strainer, it really makes a difference but isn't absolutely necessary.
Pour into dessert dishes and lay a piece of waxed paper or plastic wrap right on the surface of the hot pudding (this will stop any "pudding skin" from forming). Chill for at least 4 hours.
NOTE: The quality of your milk chocolate chips makes a difference; make sure they are real chocolate, not imitation.
NOTE: Make sure you use unsweetened baking cocoa.
PECAN SANDIE COOKIES
I think of my dear sweet mother every time I make these pecan sandie's, they were her favorite kind of cookie; I think Keebler made them if I remember correctly.
This recipe makes a lot of cookies, so you can also bake part of them and save the rest of the chilled dough for later in the week!! It is also a great holiday recipe because they travel well and they are always a hit at cookie exchanges.
2 cups butter (no substitutions) room temperature
1 cup granulated sugar
1/2 teaspoon salt
2 teaspoons vanilla extract
1 teaspoon coconut extract (see note)
4 cups all purpose flour
1 cup chopped pecans
In the bowl of an electric mixer, beat the room temperature butter, sugar, salt and extracts until the mixture is light and fluffy (takes a few minutes and looks sort of like whipped cream when you are done).
Add the flour, one cup at a time, until well mixed. The dough will seem VERY thick, so a stand mixer works best but it isn't absolutely necessary. You will know you have mixed it enough when the cookie dough starts to come away from the sides of the mixing bowl.
Divide the dough into 4 logs about 2" in diameter. Roll the logs in plastic wrap and chill in the fridge for about an hour (or up to several days).
When it's time to bake, slice the cookie dough logs into 1/4" slices and roll (tops and bottoms) in granulated sugar. Place on ungreased cookie sheet and bake at 350 degrees for 18-20 minutes (my oven took exactly 18 minutes) or until the edges are JUST STARTING to turn golden.
OVEN BARBECUED CHICKEN
I made this for the first time a couple of weeks ago and it was an instant hit with Picky-Picky husband. As a matter of fact, he gave it a thumbs up three times before the dinner dishes were done (that is almost unheard of).
Basted with a maple flavored barbecue sauce; this recipe produces a mildly sweet and sticky-yummy chicken. Served with biscuits and corn on the cob, it is a great way to enjoy barbecue flavor (indoors) during the fast approaching winter season.
HALLOWEEN Q-TIPS
This is more of an idea than a recipe, but it is SO CUTE and super quick and easy. Even the youngest "cooks" in your house can do this one easily and what a fun idea to have a bowl of these at your next "spooky" Halloween party.
All you need is some white lollipop sticks, some miniature marshmallows and some peanut butter chips; it is quick and easy!!
The lollipop sticks come in a couple different lengths, so whatever length you use, just try to cut them down (if necessary) so they are Q-Tip size.
Push a miniature marshmallow onto each end. Dip the marshmallow into melted peanut butter chips and lay them on some waxed paper to cool.
I just melted a few peanut butter chips + and a drizzle of milk in the microwave until it was melted (about 20-30 seconds). Any flavor chocolate chips will work fine.
YEAST BREAD FOR BEGINNERS
I've been making this bread recipe for nearly 40 years and it has never failed me. It is a basic white bread that goes together in minutes (I make this recipe about once a week). It is nearly fool proof and a great recipe for beginning bread makers.
3 tablespoons granulated sugar
1 tablespoon table salt
2 envelopes of active dry yeast
3 tablespoons vegetable oil
2½ cups very warm water
In the bowl of a stand mixer, place 2 cups of all purpose flour, 2 packets of dry active yeast (I use 2 level tablespoons because I buy it in a larger jar), 3 tablespoons of granulated sugar, 1 tablespoon of table salt and 3 tablespoons of vegetable oil (I use canola oil). Stir together
NOTE: Normally, most yeast recipes tell you to dissolve the active dry yeast in water that is 110 degrees before you add it to the flour. However, 99.9% of the time I do not do it that way. If you mix the DRY yeast into the DRY flour, you can add hotter water because the flour will cool down the water before it can damage the yeast.
That may sound complicated, but it isn't. The advantage of adding warmer water, is that it will jump start your yeast and your bread dough will raise faster using this method.
If you are nervous about doing it this way, it might be a good idea
to use an instant read thermometer with your first few batches of bread (just to reassure yourself). However, it isn't rocket science and after you make bread a couple of times, you will quickly learn what the water is supposed to feel like by holding hour hand under the running tap water.
When I mix the DRY yeast into the Dry flour, I used 120° water
Stir 2½ cups of 120 degree water into the flour mixture and stir vigorously with a wooden spoon while you pour. Let this mixture sit for about 10 minutes; this will give the yeast time to activate.Start adding the rest of the flour, half cup at a time, mixing with a sturdy spoon in between each addition. When the dough gets too stiff to mix with a spoon, attach a dough hook to your stand mixer and turn on low.
Eventually, you will get all 5 cups of flour into the dough. When that happens, let your machine knead the dough (gently, on a low setting) for about 6-8 minutes (or by hand for 6-8 minutes).
Stop you mixer every once in a while and pull all the dough off of the dough hook, scrape down the walls of your bowl and turn the ball of dough completely over and start the mixer again. You will have to do this a few times until the shag totally disappears and the dough clings together in a nice semi-solid "glob".
like this after an hour
(doubled in size)
Many serious bakers weigh their flour, but I find that keeping a close eye on how the flour is "behaving" works better than weighing. On a humid day it may take an extra tablespoon, on a rainy day a tablespoon less. So be stingy with that last half cup of flour until you see how the dough acts in YOUR climate. Keep in mind that too much flour makes for a DRY bread.


